- Mon Aug 18, 2008 10:08 pm
#66616
Well some twat snapped mine off while I was stopped at a traffic light. Luckily I had a replacement and decided I'd get on with it in the evening after work. BTW yes I do use the radio during rush hour for traffic updates  lol
lol
Tools required
ESTIMATED TIME TAKEN: 15 Minutes

1) Cover your paint/body with a protective piece of material.
2) Mount the tip of your spanner into the grove of the antenna fixture.
The flat inside part of your spanner must be level with the walls of the grove.

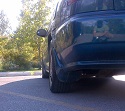
3) Smack the spanner horizontally with your mallet to the bottom of your spanner as seen in the picture below. It will take a few hard knocks to loosen the fixture. NOTE: You only want to loosen it.

4) Once this is achieved, take your mole grips and grip the edges of the fixture. Remember to only grip the metal bit not the black plastic, or the black plastic will look chewed up.

5)Keep rotating the fixture counter-clockwise using the mole grips until the fixture is loose and raised enough for you to pull.

6) Pull the fixture.

7) Pull off the black plastic housing.

 Pop your bootlid/trunk
9) On the left/right peel back the carpeting.

10) Locate your Power Antenna unit.

11) Grab your 10 mm socket and wrench, loosening the small bolt holding the motor in place. You only need to loosen it not remove it.


12) Remove the rubber pipe which is connected to the motor

13) Remove the harness clip.


14) Remove the Power Antenna by pulling the bottom of it first towards you and then the whole unit should have enough clearance to be removed completely away from it's fixing point.

16) You will now be able to see the antenna cable which transmits the radio waves to your stereo. Pull away the antenna cable from it's socket.

JOB DONE!
I decided to replace mine, so replacing the unit is just a straight forward reversal.


Hope this helps somebody, because I couldn't really find any illustrated versions of the DIY and it fustrated me.
Regards
Sanjesh
lol
Tools required
- 10 mm Socket with wrench
Mole Grips (Pliers)
Rubber Mallet
13 Spanner
A soft material which you can use to prevent scratching to your paint (Needs to be somewhat thin as you'll need to work around it, a sponge would be ideal)
Your hands/eyes/a brain if you can find one laying around
ESTIMATED TIME TAKEN: 15 Minutes
1) Cover your paint/body with a protective piece of material.
2) Mount the tip of your spanner into the grove of the antenna fixture.
The flat inside part of your spanner must be level with the walls of the grove.
3) Smack the spanner horizontally with your mallet to the bottom of your spanner as seen in the picture below. It will take a few hard knocks to loosen the fixture. NOTE: You only want to loosen it.
4) Once this is achieved, take your mole grips and grip the edges of the fixture. Remember to only grip the metal bit not the black plastic, or the black plastic will look chewed up.
5)Keep rotating the fixture counter-clockwise using the mole grips until the fixture is loose and raised enough for you to pull.
6) Pull the fixture.
7) Pull off the black plastic housing.
9) On the left/right peel back the carpeting.
10) Locate your Power Antenna unit.
11) Grab your 10 mm socket and wrench, loosening the small bolt holding the motor in place. You only need to loosen it not remove it.
12) Remove the rubber pipe which is connected to the motor
13) Remove the harness clip.
14) Remove the Power Antenna by pulling the bottom of it first towards you and then the whole unit should have enough clearance to be removed completely away from it's fixing point.
16) You will now be able to see the antenna cable which transmits the radio waves to your stereo. Pull away the antenna cable from it's socket.
JOB DONE!
I decided to replace mine, so replacing the unit is just a straight forward reversal.
Hope this helps somebody, because I couldn't really find any illustrated versions of the DIY and it fustrated me.
Regards
Sanjesh