DIY: Painting the valve cover
TrippSol's "How-To" on painting your valve cover
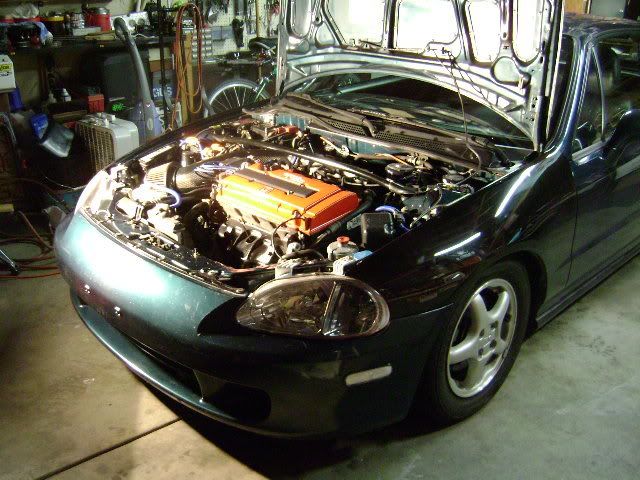
Keeping your engine bay is important! Why?... A clean bay is the best way to notice if the engine is leaking anywhere. A clean engine bay will also raise the value of the car.
Questions and comments always welcome.
Bare minimum of what you will need:
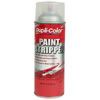
☼ 1 can of Paint Stripper. (I used 1 can of Duplicolor Paint Stripper) =$8
☼ 1 can of engine paint. (I used Duplicolor 500º Engine paint.) =$6
☼ 1 Valve cover gasket. (You don't have to, but reusing gaskets is always kinda sketchy)
☼ A good strip of sand paper. You really shouldn't need too much. (Use a tiny enough grit to not dig into the valve cover, not sure what grit I used, use your best judgment)
☼ something to scrape with. (I used a razor blade and a flat head screwdriver. A wire brush does well if it is accessible to you)
☼ Painters tape/masking tape.
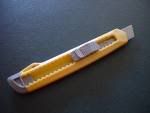
☼ A nice razor blade that can be held like a Pen.
☼ Old clothes, eye protection (Highly recommended)
☼ A place to paint (Try to do it inside a garage, rather then outside. This will help with consistency of the spray, and to prevent nature from dropping dirt on the wet paint)
-------------------------------------------------------------------------------
[Clean the area around your valve cover] Straight and simple. You don't want any debris falling into your engine.
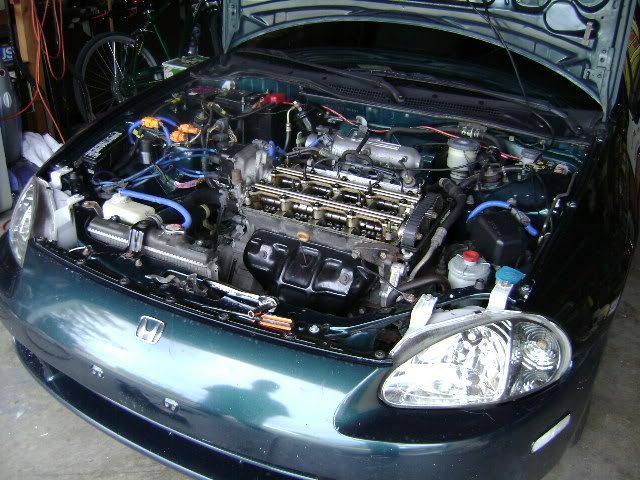
[Remove your valve cover] This is easy. There should be about 8 10mm nuts on the top of the valve cover (this will vary depending on engine, I'm repainting a B16). Remove spark plug coils and nuts. Also make sure you have removed the valve cover gasket, and the 4 spark plug seals from the 4 holes. (I placed a clean rag over my open engine to avoid anything falling in)
[Strip the paint] Remember, the prep work is more important then the actual painting it self, take your time. Take the valve cover outside somewhere, and give it a good coat of the paint stripper. Its good to let this stuff set in for about 5 minutes. Scrape/wipe away what the stripper has lifted. Re apply more stripper to parts of the valve cover with paint still remaining. (I did this about 4 times, you will most likely use the whole can)
[Sand] Lightly go over the entire cover. Focus on any scratches you might have made removing the old coat of paint.
[Hose it off] Rinse off all the flakes and debris.
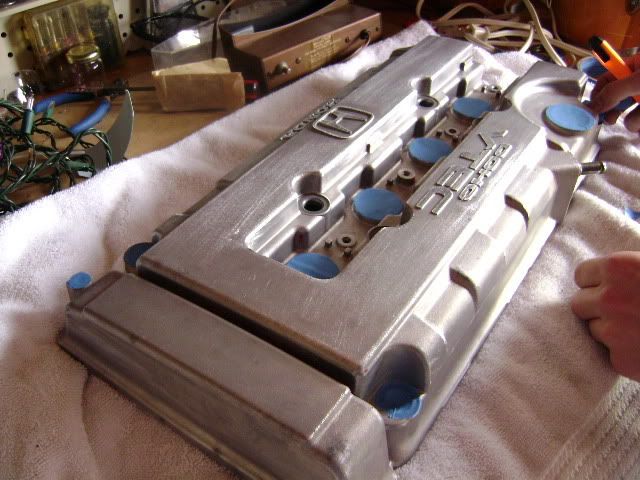
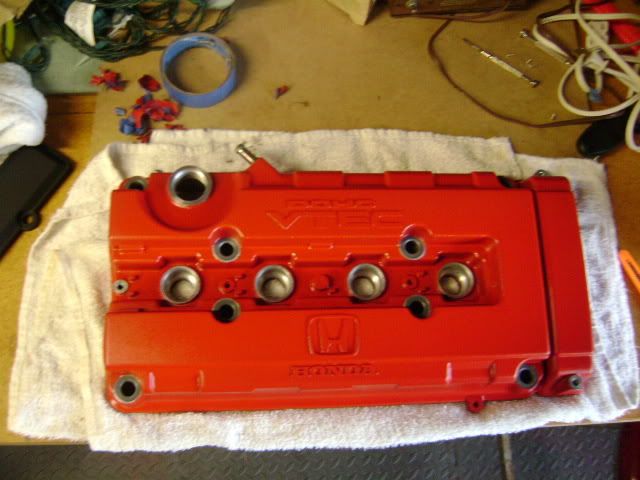
[Tape off all ports and screw holes] I just placed a square of masking tape over the parts i didn't want painted. Then I cut along the edges with a sharp razor blade.

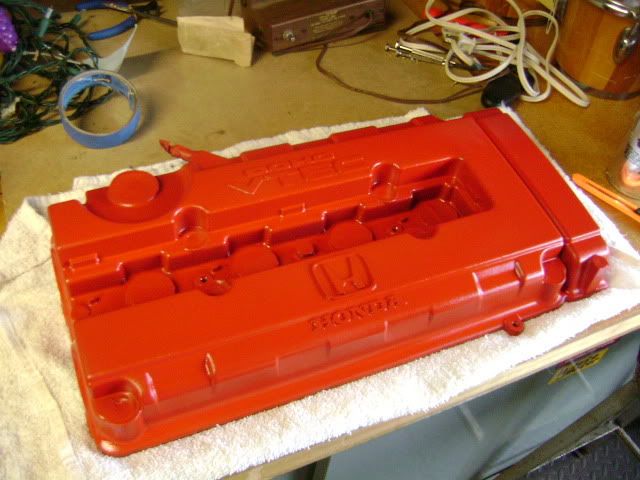
[Applying the paint] Place the valve cover on something that you will be able to rotate. (I balanced the valve cover on a small stack of 2x4s on the spark plug ports, so that the edges can be sprayed with out sticking to what ever you put it on. I threw about 3 coats on it in intervals of about 10 minutes. Try to get even light sprays. I let it sit for about 4 hours until it was dry to touch.
[Peel the tape off] Bring the valve cover back to your clean station. Use a screw driver or a razor blade to lift the edges of the tape up, and remove.
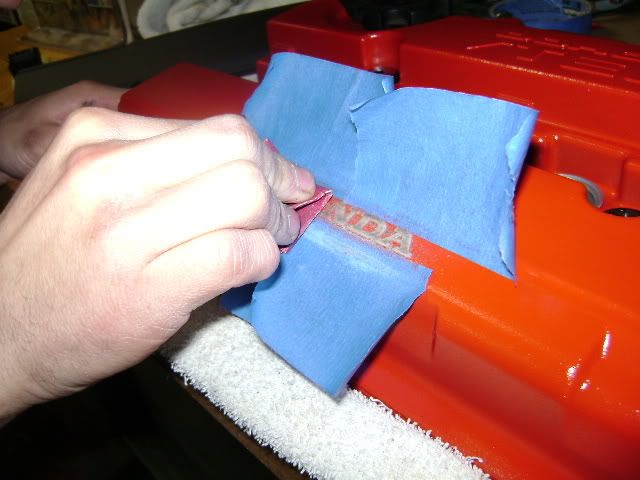
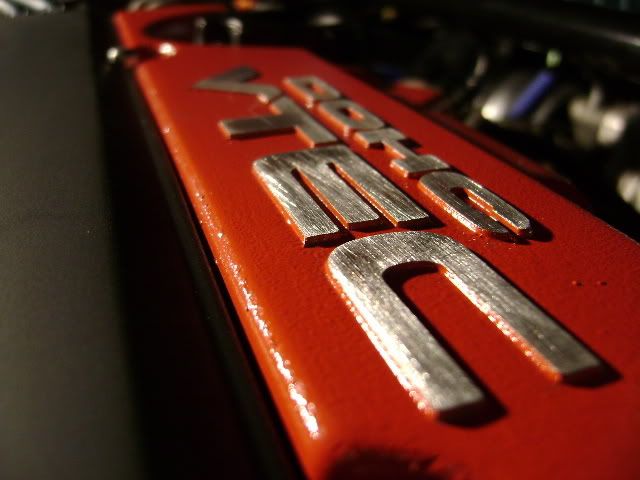
[Sand emblems] Make sure the paint is dry for sure at this point. Tape off the area around the letters. This will make sure you wont accidentally miss and scratch the new paint. A clear coat on the sanded emblems will help protect from corrosion.

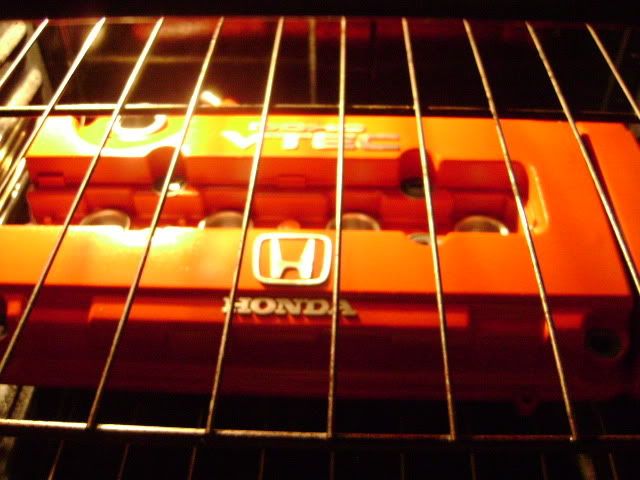
[Oven treatment] If you have managed to get the wife's approval, place the valve cover on the center rack for about 45 minutes to an hour at about 275º. Smells like a mans kitchen! This will help the paint bond to the valve cover. Take it out and let it sit for 30 minutes and cool down.
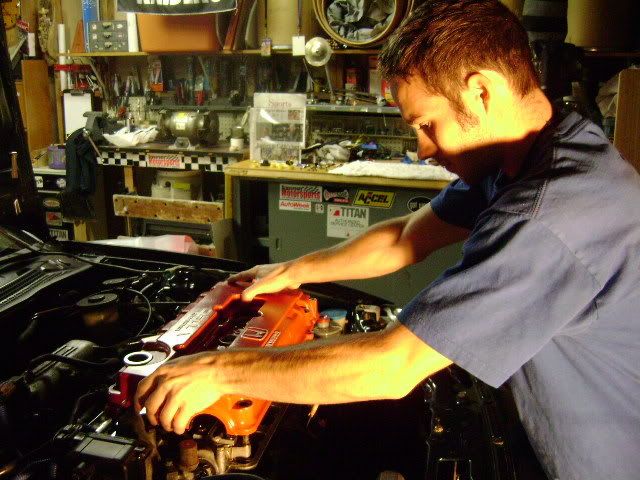
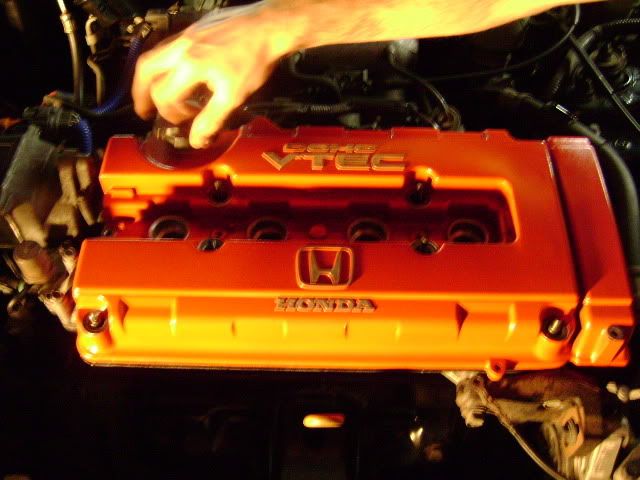
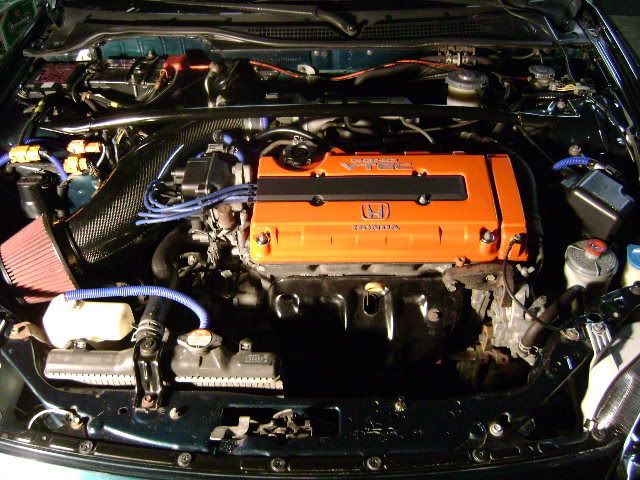
[Install the valve cover] Put your new gasket on. Dip your finger in some clean oil, or oil from the open head, and lube up the new gasket. Replace the old spark plug seals, or new ones. carefully put the valve cover back on. Make all of the nuts snug, but don't over tighten. (torqe specs could be found in the repair manual for the car, or the internets)
I hope this will be useful for someone.
Keeping your engine bay is important! Why?... A clean bay is the best way to notice if the engine is leaking anywhere. A clean engine bay will also raise the value of the car.
Questions and comments always welcome.
Bare minimum of what you will need:
☼ 1 can of Paint Stripper. (I used 1 can of Duplicolor Paint Stripper) =$8
☼ 1 can of engine paint. (I used Duplicolor 500º Engine paint.) =$6
☼ 1 Valve cover gasket. (You don't have to, but reusing gaskets is always kinda sketchy)
☼ A good strip of sand paper. You really shouldn't need too much. (Use a tiny enough grit to not dig into the valve cover, not sure what grit I used, use your best judgment)
☼ something to scrape with. (I used a razor blade and a flat head screwdriver. A wire brush does well if it is accessible to you)
☼ Painters tape/masking tape.
☼ A nice razor blade that can be held like a Pen.
☼ Old clothes, eye protection (Highly recommended)
☼ A place to paint (Try to do it inside a garage, rather then outside. This will help with consistency of the spray, and to prevent nature from dropping dirt on the wet paint)
-------------------------------------------------------------------------------
[Clean the area around your valve cover] Straight and simple. You don't want any debris falling into your engine.
[Remove your valve cover] This is easy. There should be about 8 10mm nuts on the top of the valve cover (this will vary depending on engine, I'm repainting a B16). Remove spark plug coils and nuts. Also make sure you have removed the valve cover gasket, and the 4 spark plug seals from the 4 holes. (I placed a clean rag over my open engine to avoid anything falling in)
[Strip the paint] Remember, the prep work is more important then the actual painting it self, take your time. Take the valve cover outside somewhere, and give it a good coat of the paint stripper. Its good to let this stuff set in for about 5 minutes. Scrape/wipe away what the stripper has lifted. Re apply more stripper to parts of the valve cover with paint still remaining. (I did this about 4 times, you will most likely use the whole can)
[Sand] Lightly go over the entire cover. Focus on any scratches you might have made removing the old coat of paint.
[Hose it off] Rinse off all the flakes and debris.
[Tape off all ports and screw holes] I just placed a square of masking tape over the parts i didn't want painted. Then I cut along the edges with a sharp razor blade.
[Applying the paint] Place the valve cover on something that you will be able to rotate. (I balanced the valve cover on a small stack of 2x4s on the spark plug ports, so that the edges can be sprayed with out sticking to what ever you put it on. I threw about 3 coats on it in intervals of about 10 minutes. Try to get even light sprays. I let it sit for about 4 hours until it was dry to touch.
[Peel the tape off] Bring the valve cover back to your clean station. Use a screw driver or a razor blade to lift the edges of the tape up, and remove.
[Sand emblems] Make sure the paint is dry for sure at this point. Tape off the area around the letters. This will make sure you wont accidentally miss and scratch the new paint. A clear coat on the sanded emblems will help protect from corrosion.
[Oven treatment] If you have managed to get the wife's approval, place the valve cover on the center rack for about 45 minutes to an hour at about 275º. Smells like a mans kitchen! This will help the paint bond to the valve cover. Take it out and let it sit for 30 minutes and cool down.
[Install the valve cover] Put your new gasket on. Dip your finger in some clean oil, or oil from the open head, and lube up the new gasket. Replace the old spark plug seals, or new ones. carefully put the valve cover back on. Make all of the nuts snug, but don't over tighten. (torqe specs could be found in the repair manual for the car, or the internets)
I hope this will be useful for someone.

