
- This Page
- Home
- The Basics
- Stealth Installs
- Misc Security
- Kill Switches
- Convenience
- Modifications
- Maintenance
Installing Actuators
- Parts
- Universal 2 wire actuator (DEI 524N) x2
- SPDT Auto Relays (bosch x2 or DEI 451M)
- Alarm (DEI recommended, ie Viper/Clifford/Python/Hornet)
- Metal Tapping Screws (1/4 inch x4)
- Zip Ties
- Thread Locker
- Tools
- Phillips #2, #1
- Drill
- Panel Popper
- Hammer
- Wire Fishing Tool
- Angle Pick
- Needle Nose Pliers
- Table Vise
Installation: difficult. 1 hour per actuator.
Door Lock Actuators
You can add keyless entry to a car that has manual door locks by installing universal actuators and connecting it to an alarm. I prefer the DEI 524N because they are low profile and sturdy, but I have used cheap ebay actuators in the past and they have worked fine. You do not want "heavy duty" actuators for your Honda. This article doesn't cover oem door lock conversions or 5 wire actuators, although I will show you how to "5 wire" them using two relays.
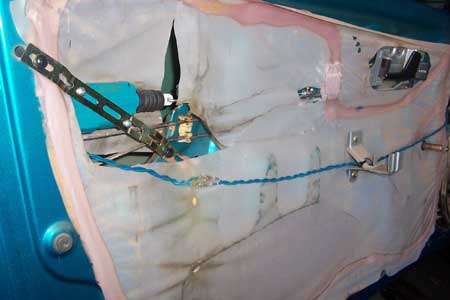
Removing Door Panel
Remove the center plastic screw and then pop out the base. Many times the center screw just spins endlessly so you may have to put pressure on it while unscrewing using a pick.
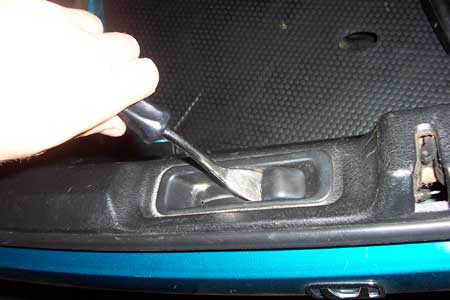
Pull the door handle trim towards the rear of the vehicle and then rotate it out.
There are special window crank removal tools but I just use a pick. Look for the metal loop inside and pull it out. Then the handle will slide right off.
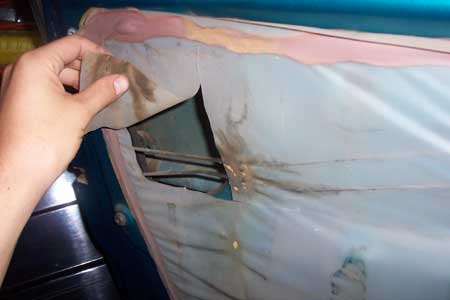
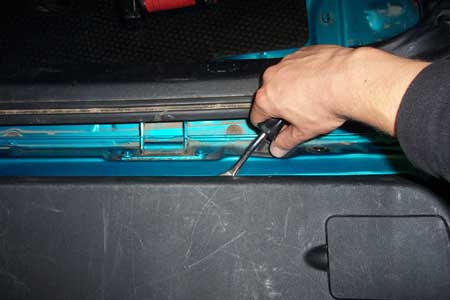
You have to be extremely careful not to break the brittle plastic underneath. Flex the panel out slightly and look for the pops. You want to pry right at the pops.
If any pops stay in the door, you have to remove them and put them back in the panel.
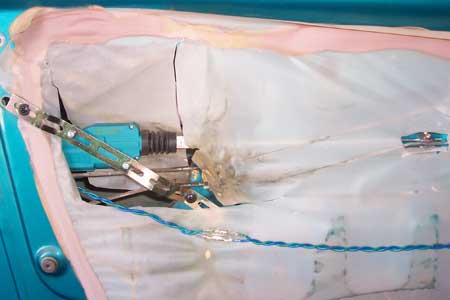
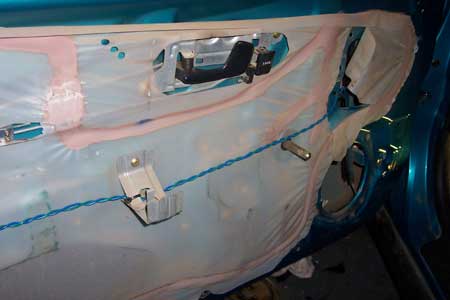
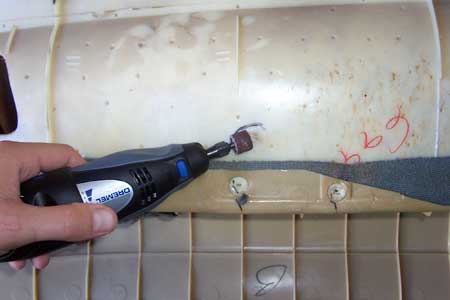
Mounting Actuator

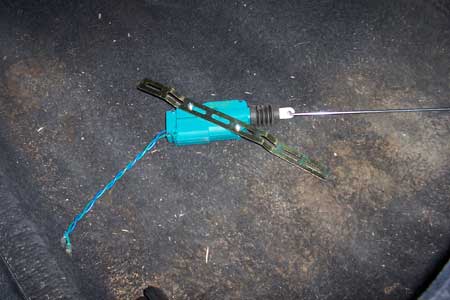
After mocking up the actuator, this is what I came up with. You can bend the backstrap using the needle nose, table vise and hammer. Your main concern is clearing the outer door panel.
Metal tapping screws are your friends. You want the actuator bar to be parallel to the door lock bar's travel path.
Run Wire

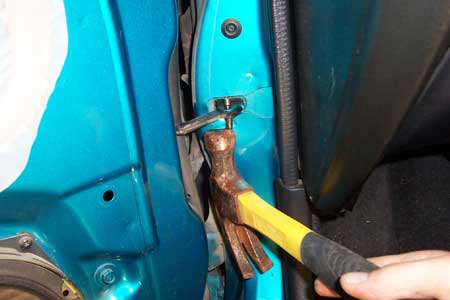
Remove the door pin so the door can swing open wider.
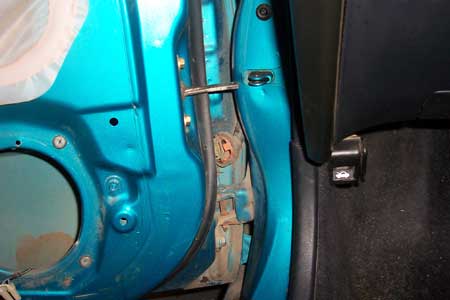
Reach in through the speaker hole and pop the grommet out from the underside. The grommet is in two pieces. don't pry the rubber off the outer piece.
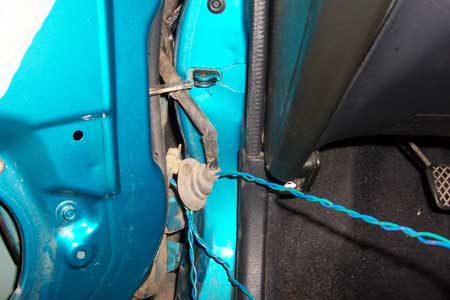
Peel the tape off and run the wire through the gap in the plastic and out the rubber boot.
Use a long zip tie, a coat hanger, or a grappling tool to pull the wire through the sleeve. Then zip tie the boots to the sleeve (there's not enough space to tape it back up).
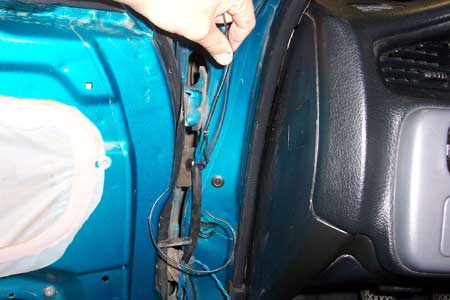
Push the wire into the cabin and pull it through from the inside. There's a foam pad in your way.
Test/Adjust
Take the battery off your drill or use a 9v battery to test the actuator. Hold one of the wires to positive and tap the other to the negative. Reverse the wires and the actuator will work in the opposite direction. On the driver's side you'll have to sit inside the car with the door closed. Otherwise the lock will not work. Honda designed it this way to help prevent you from locking your keys in the car.
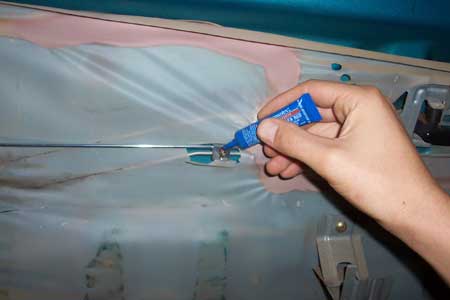
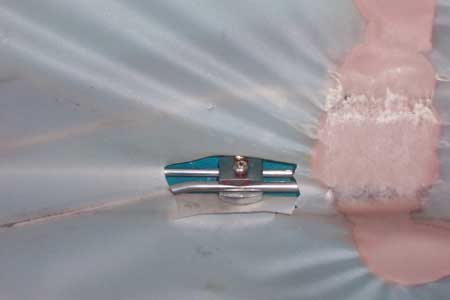
Clamp the actuator rod to the door lock rod in such a way that the actuator arm doesn't run out of travel in either direction. Then apply thread locker, otherwise those little screws will work their way loose.
You may have to cut away some sheet metal to make room for the actuator. In my case, after adjusting the mounting of the actuator to better clear the door panel, the actuator arm was hitting the sheet metal when fully extended.
Test it again after you snap the door panel back on. More than likely, the door panel will interfere with the actuator arm, rod, or clamp and you'll have to adjust it or cut away some material from the panel for clearance.
Wiring
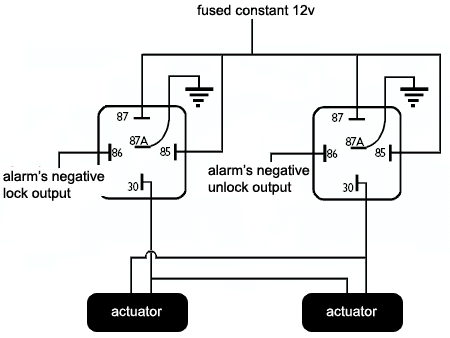
Connecting the blue to negative and the green to positive will cause the actuator to pull. Reversing the blue and green causes it to push. Whether this locks or unlocks your door depends on which direction you have the actuators facing. In my case, pull is unlock and push is lock.
Some DEI alarms come with the 451M built into the alarm brain and a 7 pin harness for the door locks. In that case, wire it up as follows.
- H3/A - Black/White to Ground (domelight)
- H3/B - White/Black to Ground
- H3/C - Green/Black to Lock wire
- H3/D - Violet/Black to Constant 12v
- H3/E - Brown/Black to Ground
- H3/F - Blue/Black to Unlock wire
- H3/G - Violet to Constant 12v
Using Two Relays Instead of the 451M
Hatch Actuator
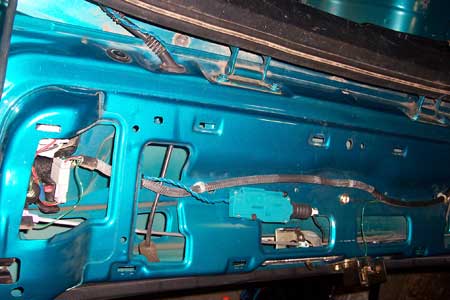
Remove Hatch Panel

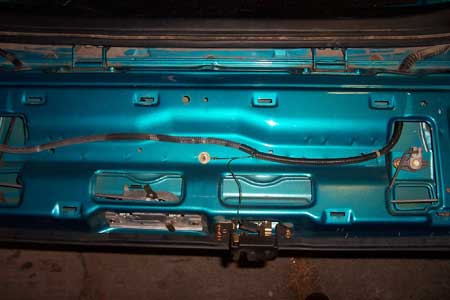
If any of the clips stay in the hatch, you have to pry them out and put them back on the panel side.
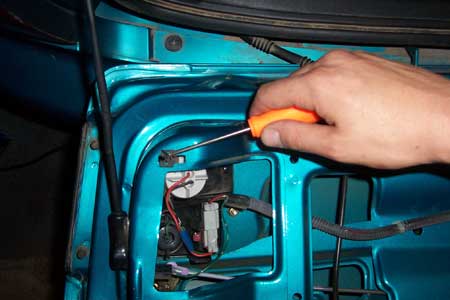
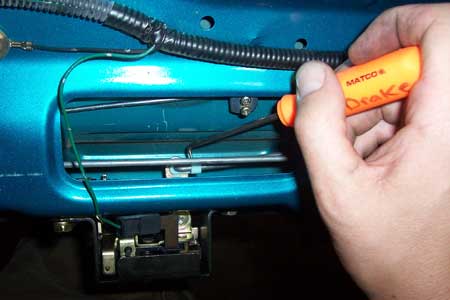
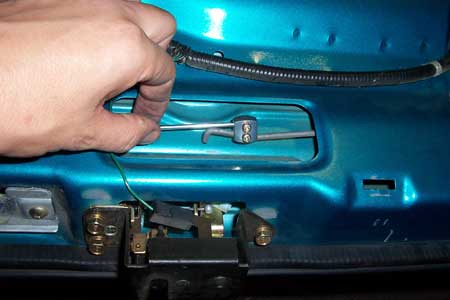
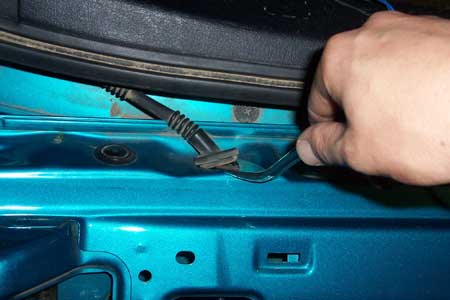
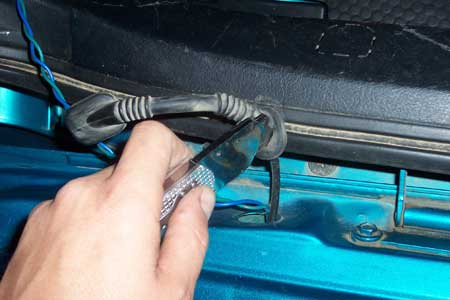
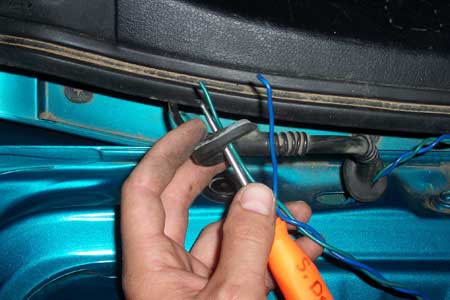
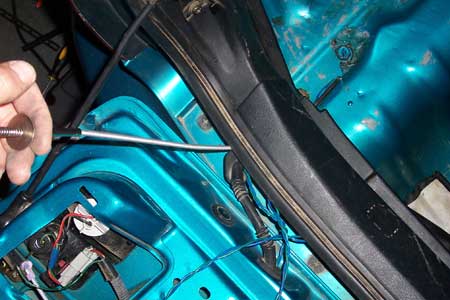
Clamp Actuator Rod
Put the key in the cylinder and turn it, observing how the rod moves. You need to mimic this movement with the actuator. Notice that we"re just popping the glass and not the lower portion of the two piece hatch.
Pry this part off and then pull the rod up.
You'll have to get pretty creative to bend the actuator rod into shape so that it can reach the hatch rod w/out rubbing against anything.
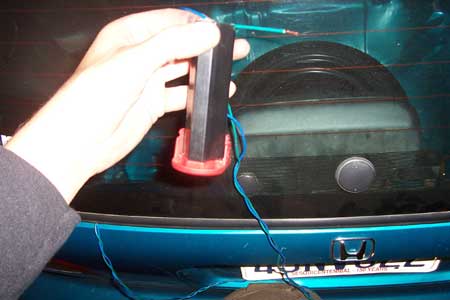
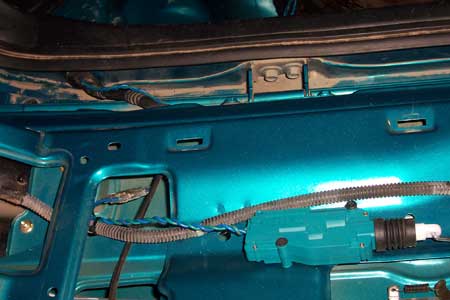
Now it's time to test it out. Unlike door lock actuators, a hatch actuator only has to pull. Close the hatch up with the wires sticking out. Hook it up to your drill battery and see if it pops the glass open the same as turning the key would. Also make sure in fact that the key still works. Adjust as necessary. If the actuator rod maxxes out its travel, it may not allow the hatch glass to close all the way.
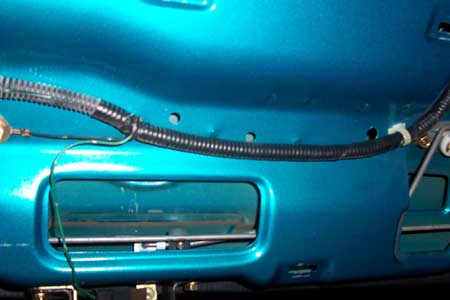
Run Wire
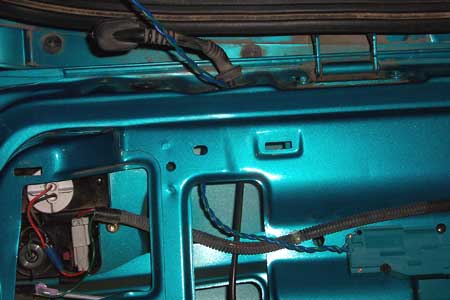
Pry out the grommets, cut a slit and run the wires through it. The sleeve is too small for the wires to pass through, so just run them alongside and cut another slit on the othe grommet.
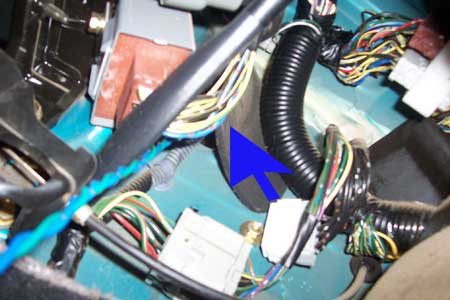
Use the wire fishing tool of your choice to drop the wire down to the spare tire area.
Wiring
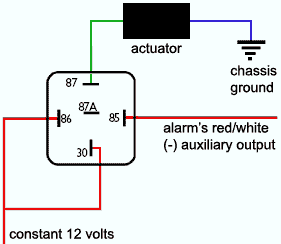
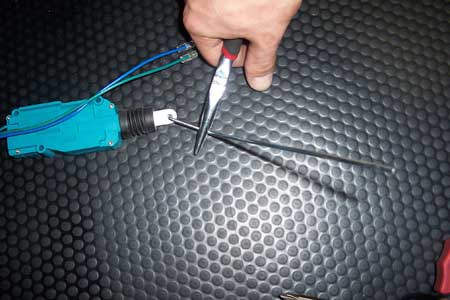
Crimp a ring terminal onto the blue wire, scrape away the paint and use a metal tapping screw to ground it. The green wire goes to the relay as shown. Wire the relay to the alarm. Use an inline fuse and branch off the alarm's constant 12v wire.
Reassemble and Test
Trim the ribbing off the panel cover as needed to clear the actuator.